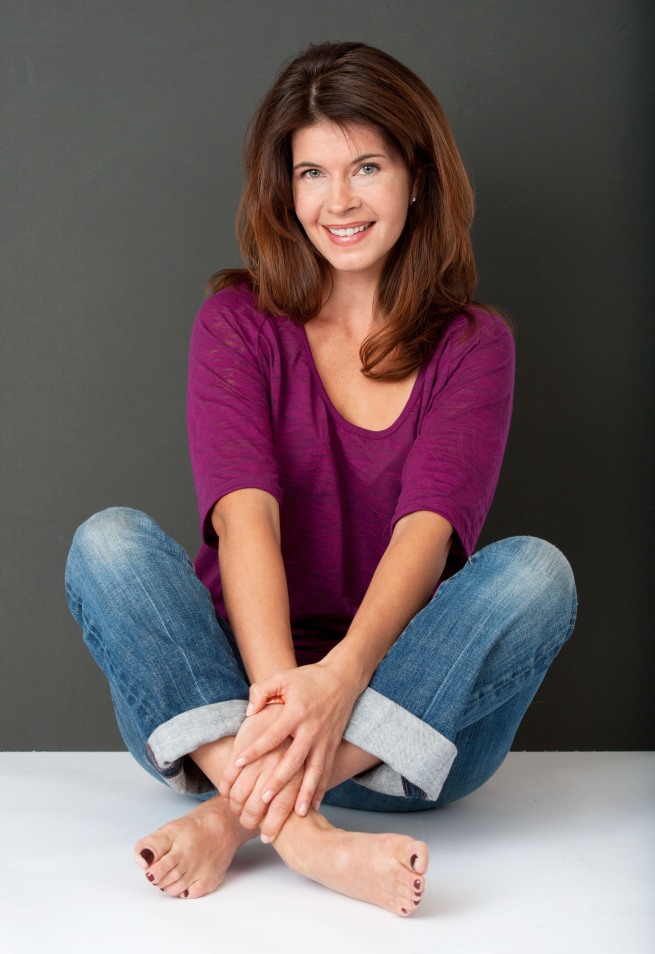
This week I wrote a guest blog post for my friend, Sandy Weiner. Sandy helps women with the dating scene and her business has a fabulous name: Last First Date. Check it out!
Here’s my blog post for Sandy: Why Stunning Photography is Important!

This week I wrote a guest blog post for my friend, Sandy Weiner. Sandy helps women with the dating scene and her business has a fabulous name: Last First Date. Check it out!
Here’s my blog post for Sandy: Why Stunning Photography is Important!
I hear this a lot: “I have a digital camera, but it’s a bit overwhelming. the camera just sits in the box. What can I do?”
1) Read the Manual. OK, you never read manuals; I don’t either. Well, you really should read the camera manual. Your digital camera likely has an amazing set of features – yes, perhaps way too many. But going through the manual and being aware of the features can help you when you later ask: “Can I do this with my camera?” I know my camera very well, but I carry the manual with me at all times and refer to it often.
2) Venture out of Auto Mode. You’re thinking this is easy, I’ll just set everything up on auto mode and won’t have to make any decisions. Your camera will likely take OK pictures, but just OK. Learn about shutter priority and aperture priority (it’s in the manual!) and try them out. It’s easy to do with a bit of effort, and your pictures will look MUCH better.
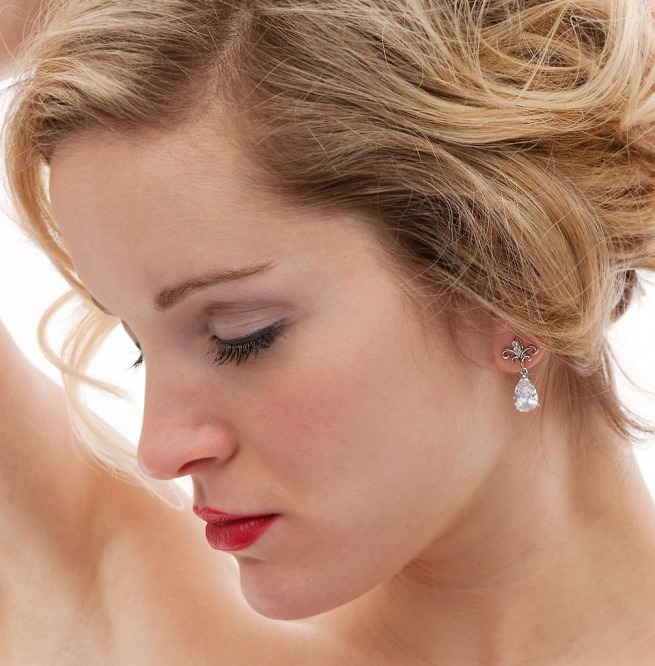
3) Get Closer. Pictures of people – and most other subjects – will benefit by getting in closer. Walk in or zoom in. It will simplify the image, add impact and engage the viewer more deeply. In this image, I started with a full body shot. As I kept shooting closer and closer, the picture got better.
4) Shoot! Shoot! Shoot! Take lots of pictures. They’re free. Take a shot, change a setting on the camera, and shoot again. Which image works better? Move around and shoot the subject from a different angle. You’ll gradually find out what works – and especially what works for you. Henri Cartier-Bresson, the famous French photographer said, “Your first 10,000 photographs are your worst.”
5) Enjoy! Little kids can pick up drawing easily and have fun from the very beginning. Adults who take up drawing mostly struggle with a lot of anxiety and critical self-judgment. Photography is the same way. Act like a kid – just relax, let go and shoot. Shoot what you care about, shoot what inspires you. Keep shooting and I know your work will get better by leaps and bounds!
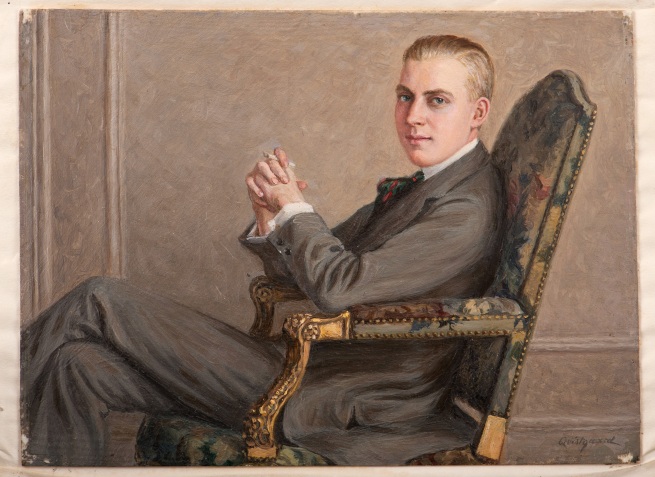
Today, I spent an enjoyable morning with this wonderful early 20th century oil painting.
This is a portrait of William Y. Bogle, Jr. His son, William Y. Bogle, III, is a friend of mine. I’ve yet to meet WYB IV and V – number five is now in boarding school in Connecticut.
This portrait was painted in 1925, when Mr. Bogle was 30 years old. During World War I, he had wanted to serve in the U. S, military, but was too young, so he enlisted in the Royal Canadian Air Force and had a distinguished career piloting the famous Sopwith Camel airplane, pictured here.
 He did land a plane in a tree once, but walked away with just a few scratches on his face. The portrait, to me, shows a sophisticated and dapper young man, war-weary yet wise to the ways of the world.
The painter was a Danish artist, with the distinguished name of Johann Waldemar de Rehling Quistgaard (1877-1962). The artist’s name appears clearly in the bottom right corner.
This painting is very small, measuring just 5 7/8 ths inches by 4 3/8 ths inches. The detailed brushstrokes are pretty amazing.
My assignment was to photograph the painting and make some prints. Working with such a small painting is tricky. My photograph appears above. I made several prints for my friend Bill, including one that is 13 inches by 19 inches – almost 10 times the area of the painting. The print is tack sharp and shows Quistgaard’s skill with a brush, perhaps even more clearly than the actual painting does.
How did I shoot the painting? Here was my setup:
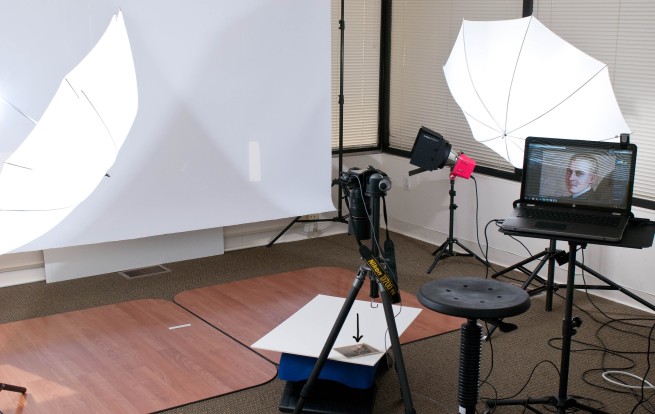
I propped the painting up, placing it on a white foamcore background. You can see how small the painting is – note the arrow pointing to it. Using a very sturdy tripod, I aimed straight down at the image. I shot “tethered” to a laptop, so I could check that the image was in sharp focus. See the laptop screen, zoomed in of Mr. Bogle’s face. The face in the painting is just over an inch tall.
Two lights were used, set at about 45 degrees. This avoided glare bouncing off the surface of the painting, but was a sharp enough angle to show the texture of the painted brushstrokes. The camera was mounted with a pro-level Nikon 105mm macro (close-up) lens that provides absolutely amazing clarity and sharpness.
I love shooting artwork. Do you have an old family portrait – or any other artwork – that you’d like to have photographed? I’m ready!
Craig Tanner has been and is an important mentor and teacher to me. I’ve taken two workshops with him and have a third planned in Santa Fe next April. Craig has critiqued several of my images. You can see some of these video critiques on my website by clicking here. There are many wonderful resources on Craig’s website, The Mindful Eye.
Here’s a short piece Craig wrote recently about creativity for those interested in growing in photography, but it also can apply, I believe, to other areas of our lives.
TANNER TIPS
A common question I get on workshops is how can I move past my current creative limits. I often first encourage a reframe of the question. We are always evolving…. sometimes a little more slowly than others but it is an ongoing process. I think a better question is “What is the next step in my evolution as an artist?” When we reframe the question in this way we are encouraged to identify first with our purpose. When we know where we would like the next step of our vision to take us then it is a lot easier to practice being there.
Tanner Tips
Here are three simple steps for growing your creativity as an artist.
1) Know your overall purpose as a photographer and the purpose for each shooting session.
2) Next practice as much as possible and practice consciously. Conscious practice is when we know what we are working on to the point of being able to identify whether or not we are making measurable progress towards our purpose or goal.
3) Finally, trust this simple but powerful process. If we just set out to make great pictures without a more specific or meaningful purpose our results may never satisfy. Our standard for great is always evolving along with our vision – just wanting to be great is not a purpose. It’s a moving target that can leave us feeling like the cat that chases its tail. But when we practice relative to a specific purpose that has an identifiable meaning we can measure our results and see clearly that we are making progress. That leads to satisfaction and a greater trust in the process which speeds us past our limits towards our infinite potential.
Craig Tanner, http://www.tmelive.com
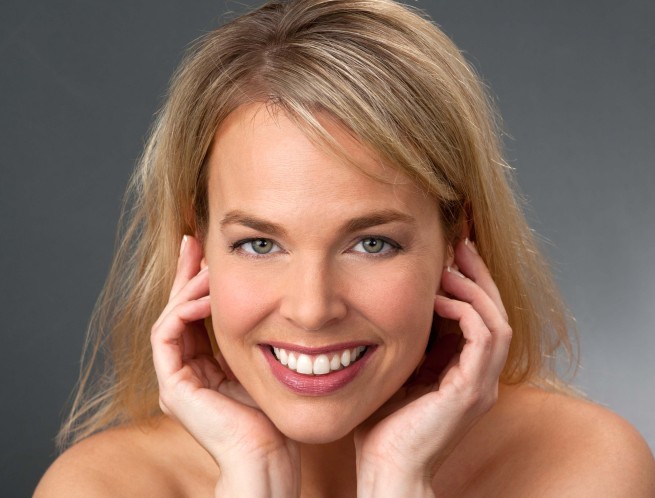
Recently I had the privilege of shooting with Laura, an experienced model and a new friend. Laura needed some updated headshots and I wanted to try a few different lighting styles. The lighting in the first image, above, is pretty traditional. We had a large main light to camera left and a fill light on low power just slightly to the right coming over my shoulder. If you look closely at Laura’s eyes, you will see the two catchlights reflecting the two studio lights. This is a classic, flattering lighting setup. A soft feel, but you still have some sense of three dimensionality – notice slightly more shading on the right side of Laura’s face (right as we look at it). There was a third light way over to the right side, just putting some highlights in her hair, but positioned so as not to hit her face.
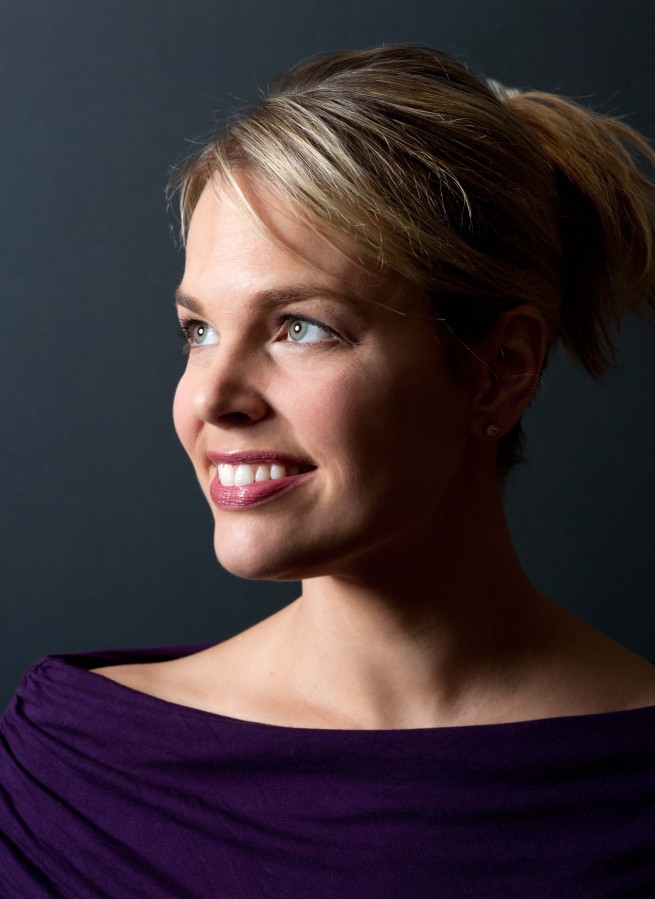
Here’s a very different lighting arrangement. There is just one small light high and to camera left. I was going for a dramatic, almost cinematic feel. This is often a difficult light for photographing women, but Laura’s smooth and clear skin could carry it off. Notice the small, well-defined catchlights in the eyes. When you look at a headshot, check out the catchlights first – they can often provide clues to how the lighting was set up.
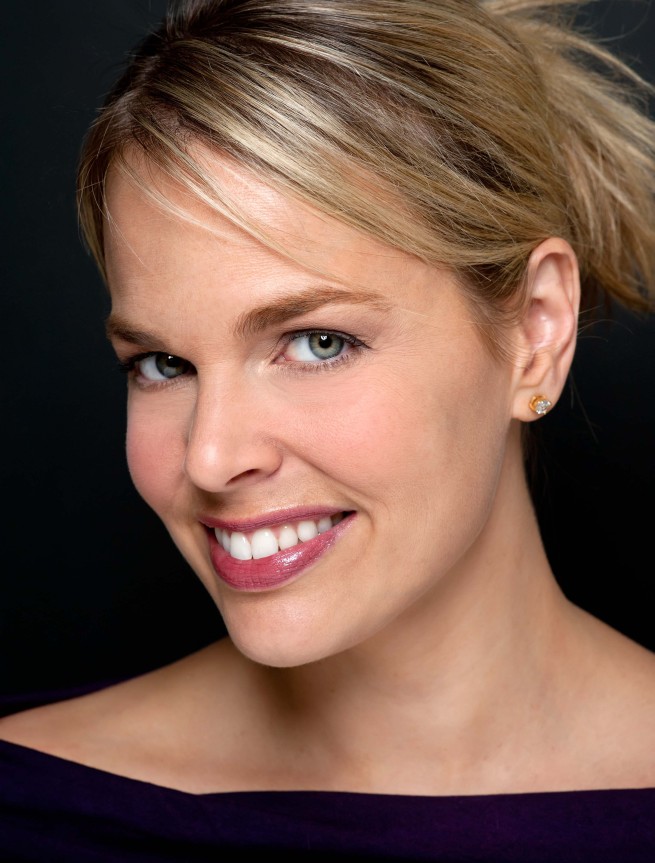
The shot above is one form of “beauty lighting” – one light directly over the camera angled down at about 45 degrees and then a reflector held just under the visible frame of the picture to reflect some light back into the face. Normally, an image with this lighting would have the model looking straight ahead, but it works well here, in my view, with a slight turn and tilt of the head.
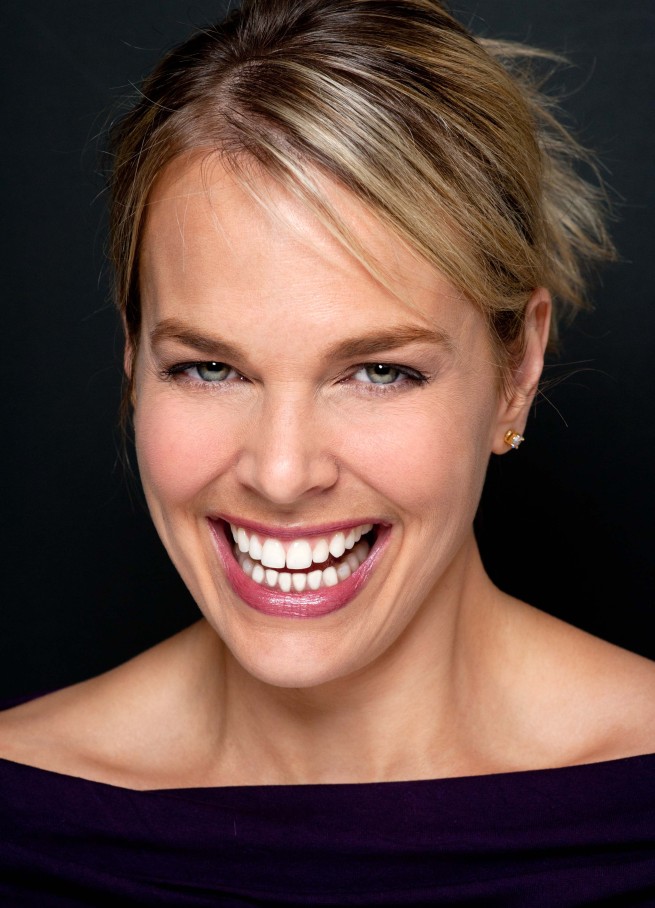
This is the same lighting setup, but with Laura’s face almost squared up to the camera. I love the spontaneous big open laugh!
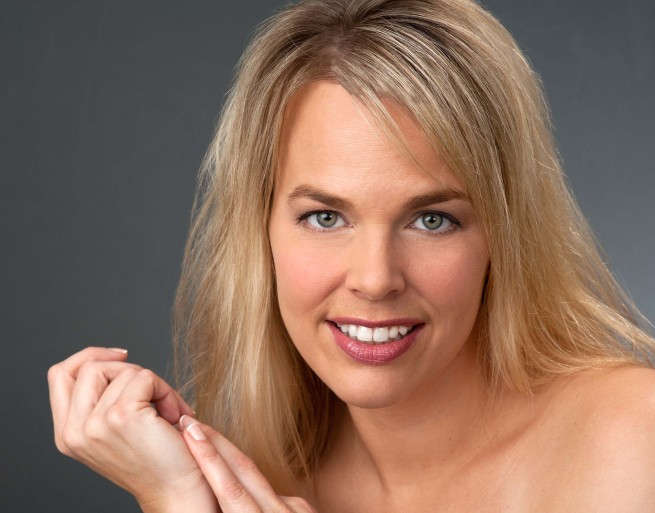
Back to soft overall lighting below. I always like to do a few headshots that include the hands. These can be tricky. Hands are very expressive and we infer a lot of emotions from them, based on how they are positioned. What feelings are you reading into this image? Your comments, as always, are most welcome – either on the blog or by email.
Today, I am the guest-blogger for 341 Studios, an outstanding marketing and graphic design firm based in Darien, CT. you can see my blog post here.